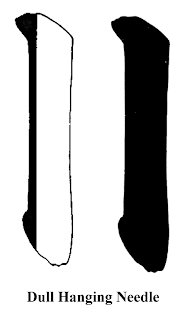
The “Sharp” Hanging Needle, is similar in appearance to the “Dull” version, except that this one “ends” with a “pointed” end. To brush the “point”, One needs to pull the “point” towards the center while the brush moves downward (this will take care of the Left side of the stroke), as the brush is lowered, it should be raised (“lifted” from the paper) in incroments until the “point” is created. This “lifting” process, is began in the final “fifth” of the stroke.
The “Carpenter's Square” is the student's introduction to a “Calligraphic” 90º angle. This stroke is began much like the “Rising” or “Horse'sl Bit" is. As it reaches the desired horizontal “length”, a “bounce” is performed (to “clean” the corner), and the stroke immeadiatly is pulled “Downward” to the desired length (then is “finished” with a “cleaning” bounce).
The “Reverse” Carpenter's square begins like the “Dull Hanging Needle”, though when the bottom of the initial stroke is completed, instead of lifting off of the paper, the brush is pulled to the Right, with a slight upward rise until the desired length is reached and then is “finished off” with the “bounce”.
The next vertical stroke, is the “Hanging Spear”. This stroke is actually a combination of a “sweep” and a vertical stroke. This stroke is began like the “Dull” Hanging Needle, but at approximately the “Mid-point” of the stroke, it begins to “curves” to the Left. At the “end” of the stroke, it comes to a “point”, similar to the “Sharp” Hanging Needle, but is “curved” to the Left. When brushing the stroke, the student should maintain the “points” course (on the Left side), and “raise” the Right side of the brush as necessary to achieve the desired “point” at the end of the stroke
The last of the Vertical Strokes, is the “Dancing Spear”. This stroke is almost identical to the “Dull” Hanging Needle, “except” that at the “bottom” of the stroke, the “point” of the brush is pulled to the Left, and the body of the brush is raised until an ending “point” is created at the desired position. The Dark line in the 2nd image, is indicating where the "point" of the brush should remain while making the stroke.


Greetings, first of all I thank you a lot for this blog, I'm very fond of Shodo but I haven't found yet a place where I can actually learn form a teacher =)
ReplyDeleteI have so many questions... first of all... this page http://www.takase.com/LearnJapaneseCalligraphy/ShodoLessons/CD001/S001/L002/L002.htm
adds a third "vertical stroke" what about that?
And... how do you know what kind of vertical or horizontal stroke you must use?
for example... for "tree" which horizontal stroke should be used?
are there any rules about that?
Again, thank you a lot for sharing this knowledge!
The 3rd stroke that you mention, is one that doesn't have the “finishing” bounce (that cleans the end of the stroke). If you notice, the first leaves a “point”, the second finishes the stroke with a 45 degree “clean” edge (though the example that's provided isn't an especially good one), the 3rd is a “cross” between the two (which the Nihon shuji “school” doesn't utilize).
ReplyDeleteThe horizontal stroke you mentioned (for “tree”) is brushed like “ichi”. You need to get the books I mentioned, they would answer ALL of your questions (with examples). The only place you can get them would be through the association (they are out of print! EEK!).
Contact me (Here) if they are unable to provide them.
There are (of course, LOL) several schools of brush calligraphy. Most are “similar” but there are (minor) differences (of which most person's would not recognize).
As for “how you would know”,... frankly, “experience” LOL, Any would be “legible”, but as you become familiar with their use, you begin to see the situations where each would apply (it sounds like a “cop-out” response, but in 20 years, I've never gotten a straight response beyond that). Also, Shodo is a very “esthetic” art, what “looks” good/correct, very often “is”.
As far as studying, try the links below to Nihon Shuji (N.Y. City and numerous other locations throughout the world, and within the U.S.), they offer a correspondence program (through the mail). It's much easier/faster (initially) when you have an instructor to visually guide you, but once you've got the “basics” understood, it's not too bad of a deal. You didn't mention your location, so I couldn't really provide much specificity.
Again, ACQUIRE THE MENTIONED BOOKS. They are invaluable to the new or experienced student.
Main Office:
Kampo Kaikan, 35 Minamigosho-Machi, Okazaki Sakyo-ku, Kyoto, Japan
Tel. 075-771-6111 Fax 075-751-1196
In Belgium:
Centre D'education de Calligraphie Japonaise, Rue Coudenberg 70, 1000 Bruxelles Belgique
Tel. 512-92-30 fax 511-79-17
Tel: (845) 418-6112
Fax: (888) 661-7409
Email: takemoribiho@gmail.com
San Francisco School
Tel. (415) 825-9276
Miyuki Otake
Sacramento School
Tel. (916) 428-4451
Etsuko Wakayama
L.A. School
Tel. (303) 986-6327
Junko Okinaka
Colorado School
Tel. (303) 838-0337
Michael Sullivan